How to Use a Computer with Less Strain
1 Introduction
Because I spend so much time on a computer, I have gradually made the following adjustments to keep my hands and arms more comfortable and reduce strain. These settings all serve the same goals: shortening the distance required for frequent actions, balancing the workload between both hands, and reducing fatigue from repetitive movements. Start by noticing which actions you perform most often and which ones cause the most fatigue, then gradually adjust your pointer speed, key placement, and division of work between your hands.
2 Use Mouse with Higher Pointer Speed
First, I set the computer’s pointer speed to its maximum, then increase it further through my external mouse’s customization software (I use a Logitech M750). On a MacBook, for example, controlling the computer with an accelerated mouse pointer requires less effort than relying on trackpad gestures. The benefits include:
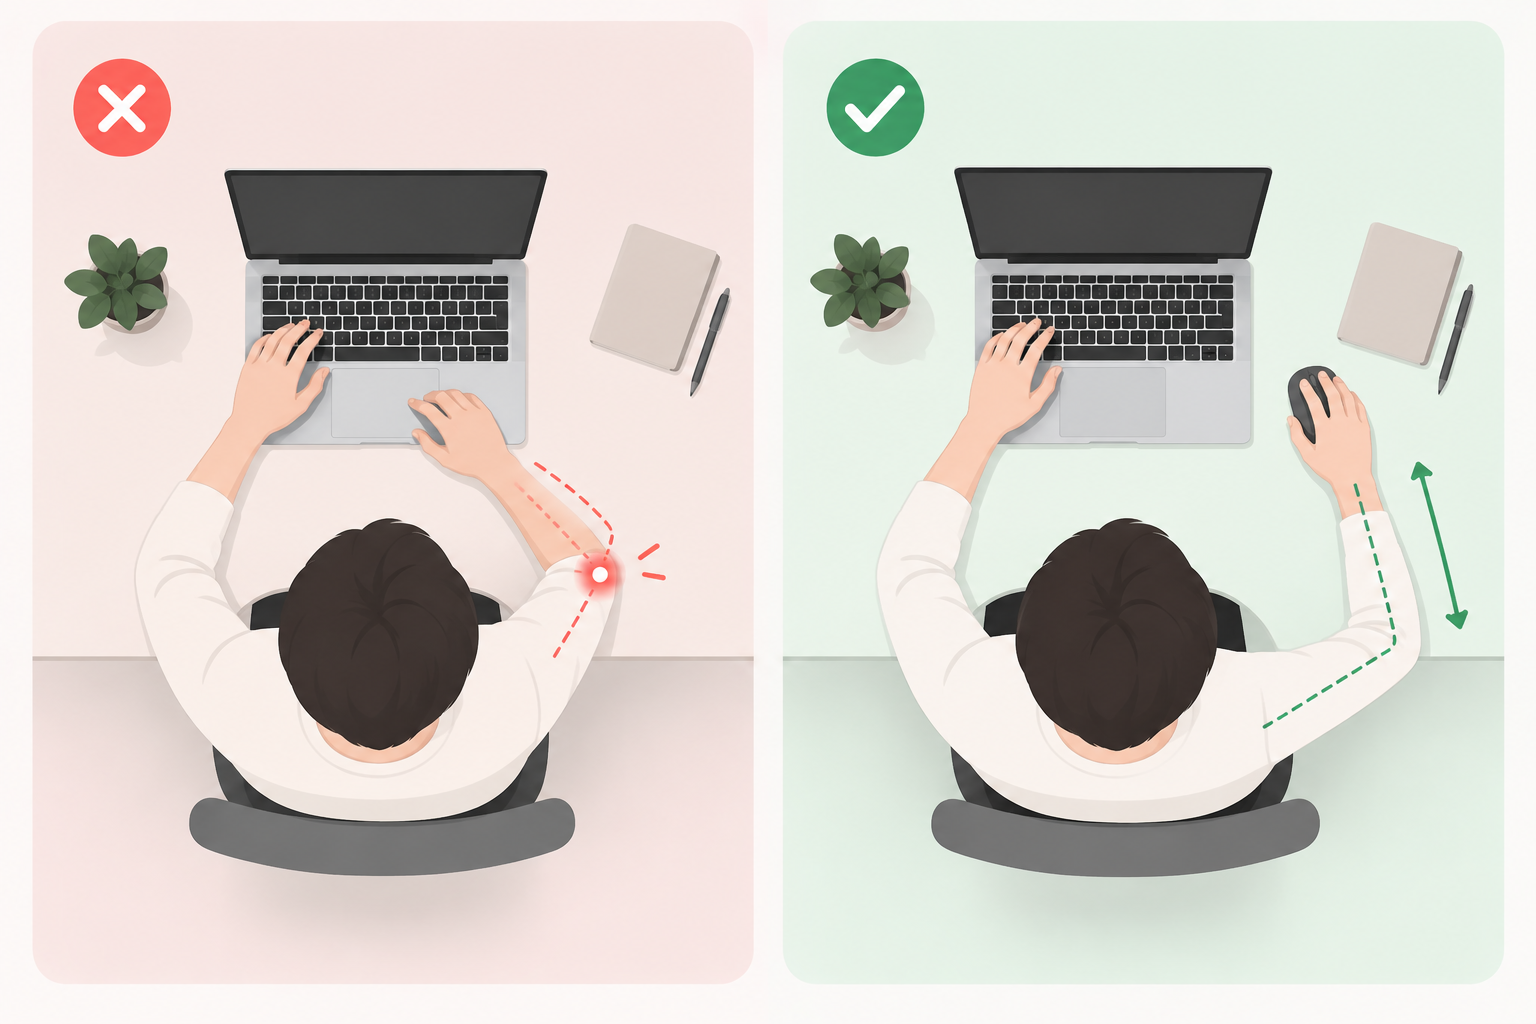
- A smaller range of motion, which helps prevent tenosynovitis
- No need to keep the right elbow bent for long periods, making it easier to stretch and change positions freely (see Figure 1)
3 Map Actions to Mouse Buttons
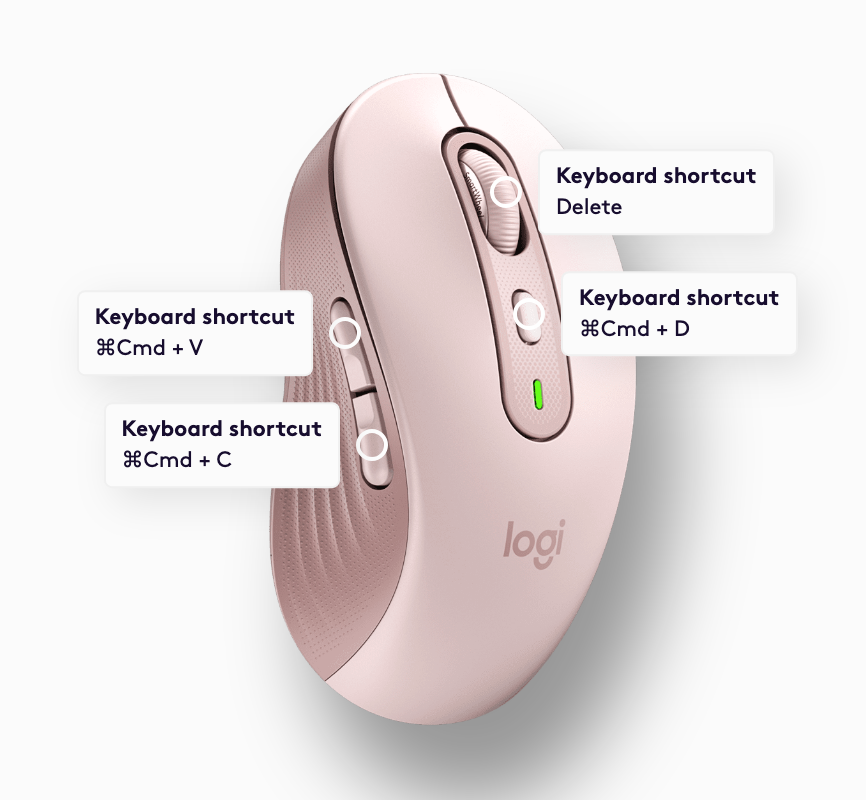
My mouse has four customizable buttons, which I have assigned to Copy (Cmd+C), Paste (Cmd+V), Delete, and Duplicate (Cmd+D). Logi Options+ also supports app-specific configurations, so in video-editing, drawing, or music software, I can assign these buttons to the shortcuts I use most often in each app.
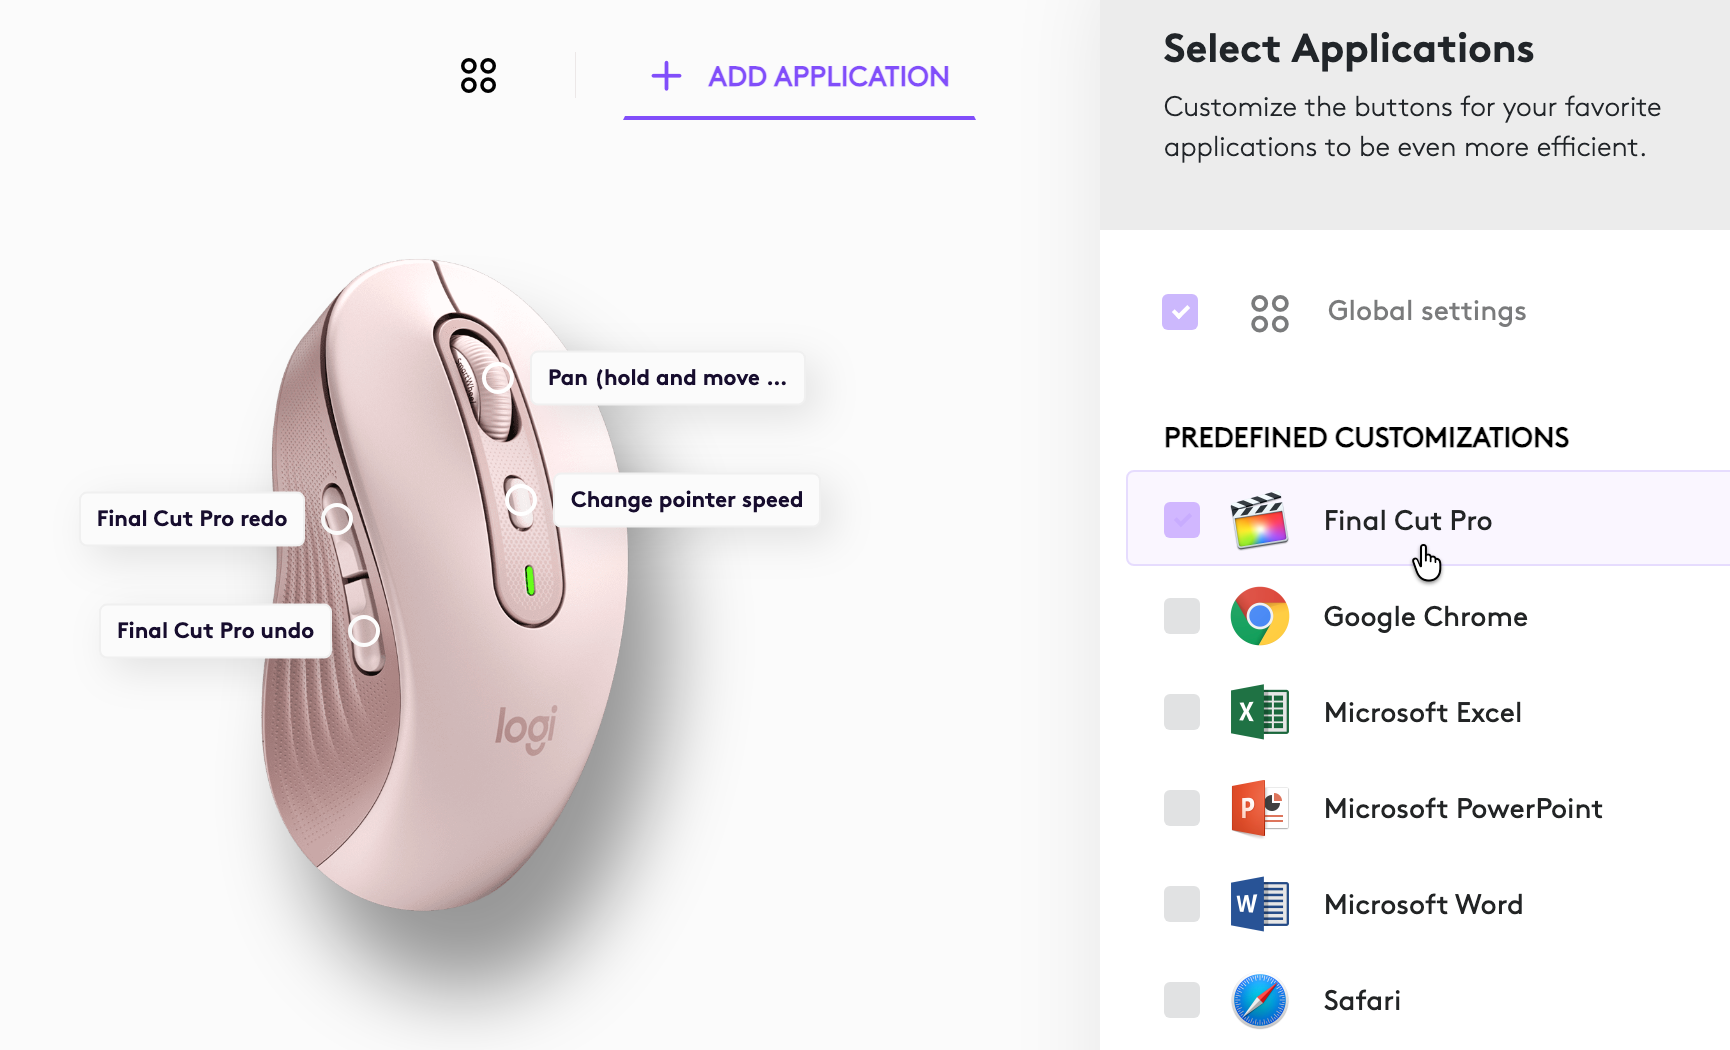
Third-party tools such as Mac Mouse Fix can also assign actions to long presses, double-clicks, and other gestures. However, it is incompatible with Logi Options+, so I do not use it. My current setup already meets my needs, so I have not added any more tools for now.
4 Use the Trackpad with Your Left Hand
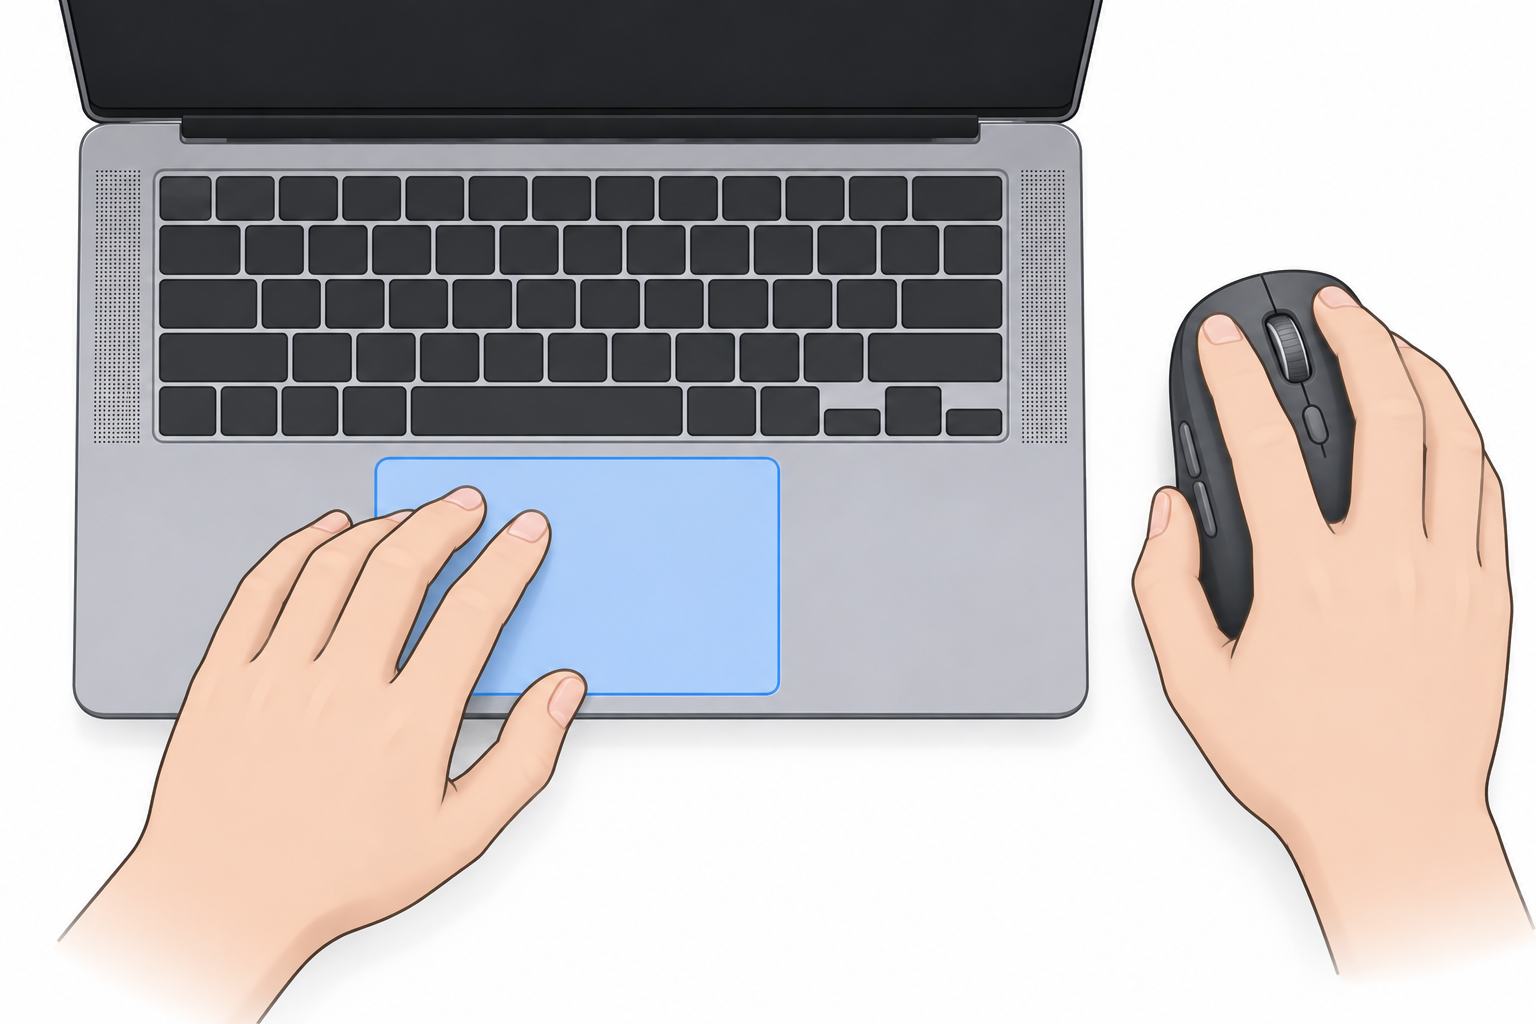
The MacBook’s trackpad is right next to the keyboard. When I need to move the pointer briefly while typing, I use the trackpad with my left hand instead of moving my right hand back and forth between the keyboard and mouse.
An external mouse and the built-in trackpad complement each other: my right hand handles sustained, precise pointer control, while my left hand makes quick adjustments between bursts of typing. As a right-handed person, using the trackpad with my left hand also helps me maintain a better balance between the two hands.
5 Press Space with Your Left Thumb
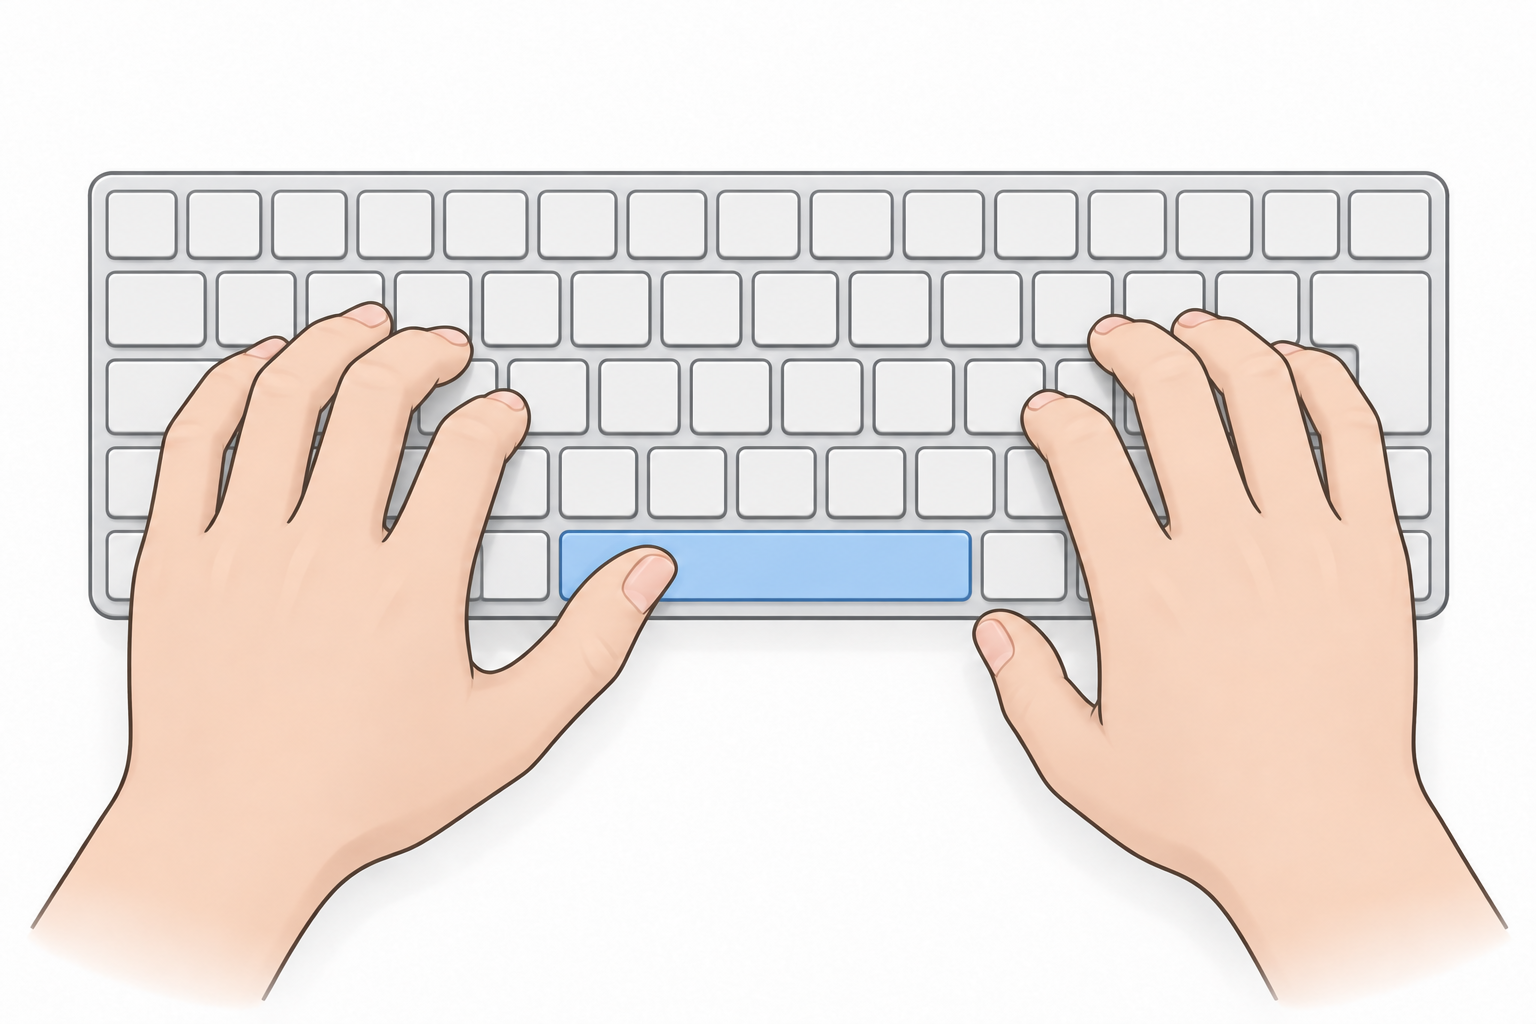
The space bar is used frequently. As a right-handed person, I deliberately press it with my left thumb. This adjustment takes almost no time to learn, yet shifts some repetitive movement from my right hand to my left and balances the workload between them.
6 Remap Caps Lock to Delete
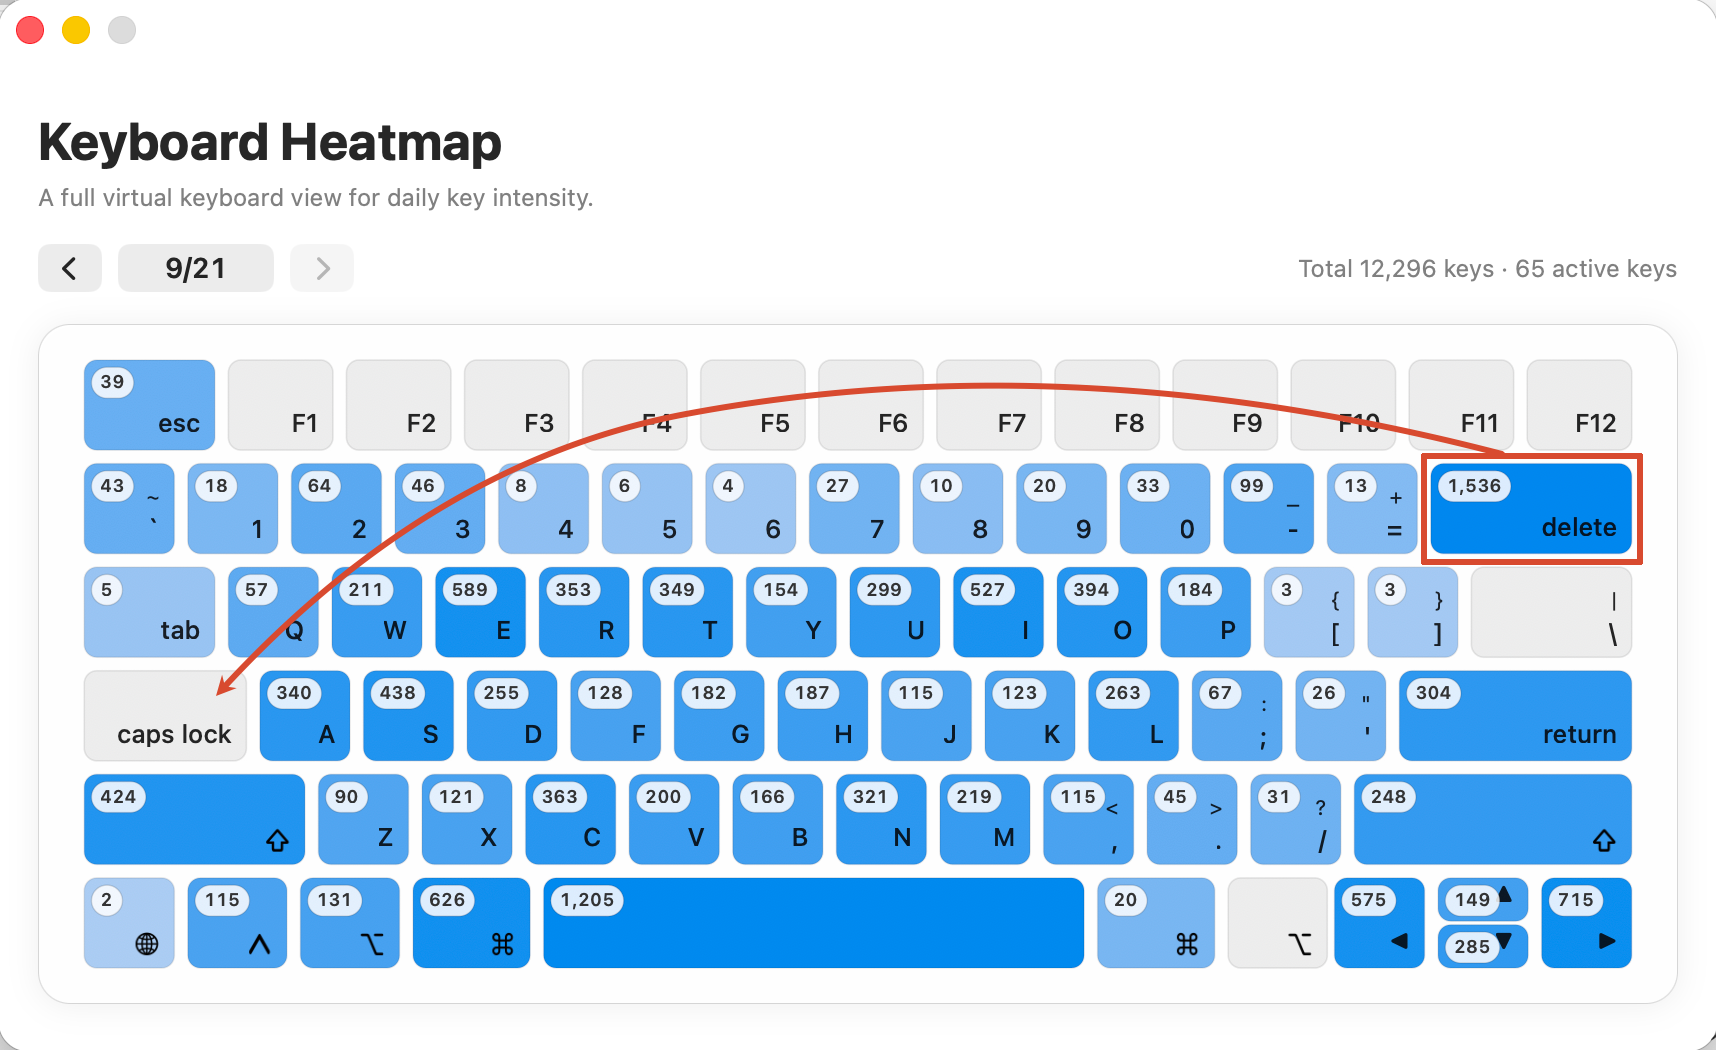
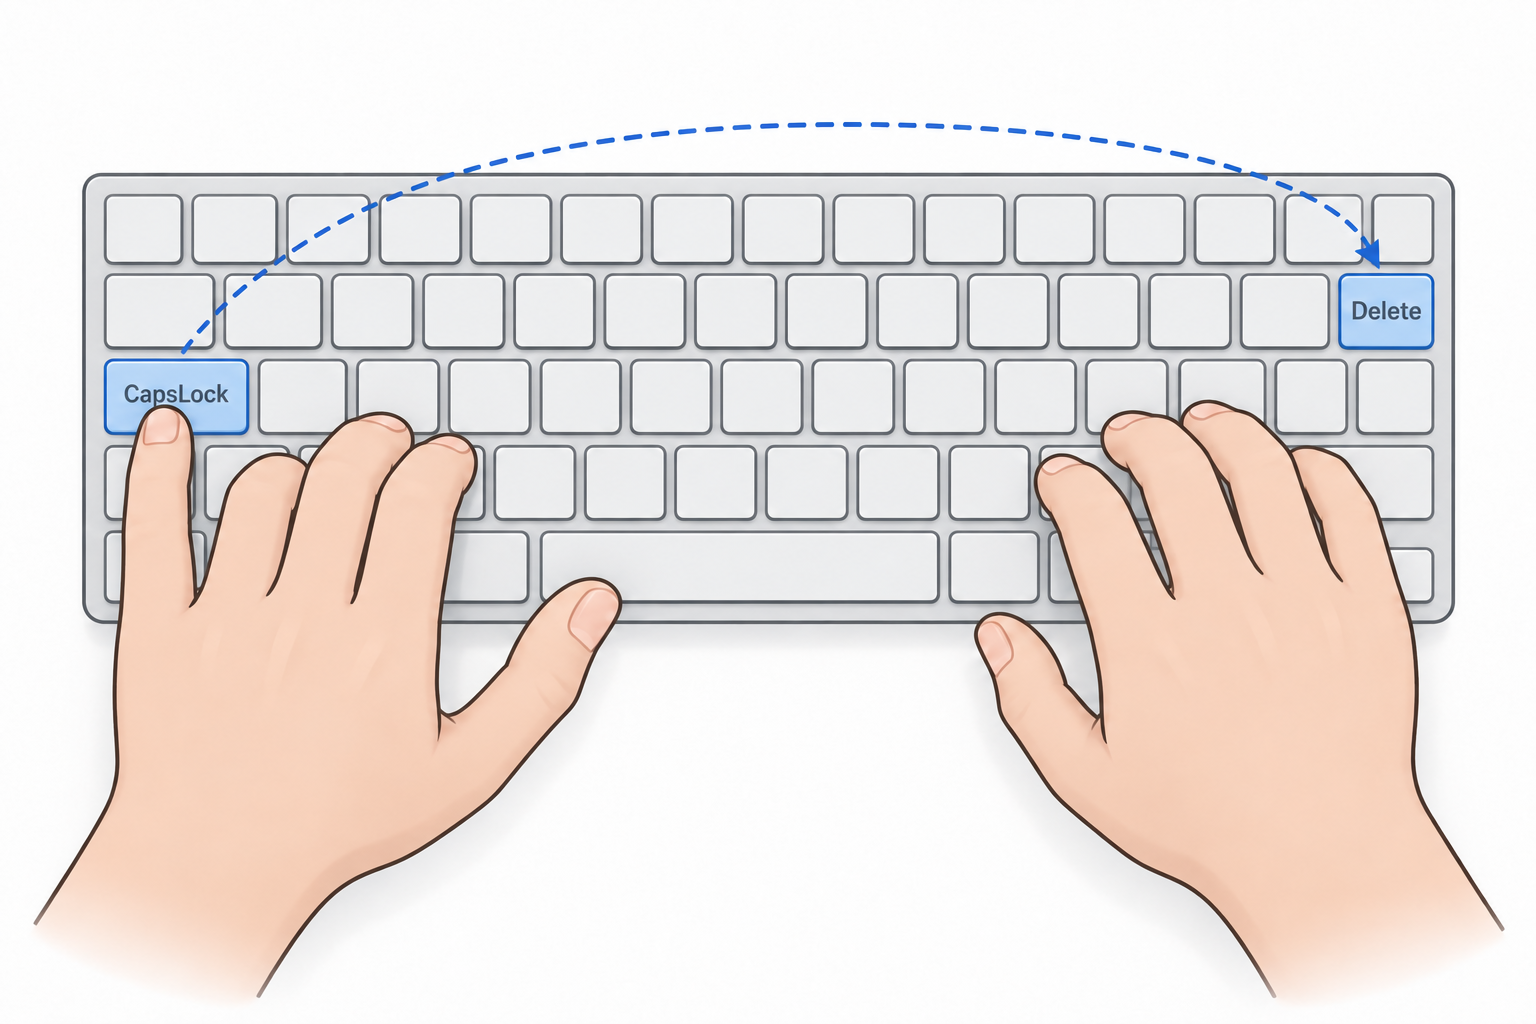
I have remapped Caps Lock to Delete so that my left pinky can delete text without leaving the home-row area. This requires less movement than reaching for the Delete key in the upper-right corner of the keyboard and further reduces the workload on my right hand.
This is one of the input optimizations that has made the most noticeable difference for me. As Figure 6 shows, I use Delete far more often than Caps Lock, yet Delete is farther away and requires me to move my right hand. For a right-handed person, the right hand already has more work because it controls both the mouse and the keyboard. Remapping Caps Lock to Delete reduces that burden while making better use of the left hand.
I can type uppercase letters with Shift + letter, and I have also configured Shift to switch between Chinese and English input. The original Delete key remains available; I can press Fn + Delete when I need to forward-delete. Alternatively, the Delete key can be remapped to Caps Lock or another shortcut.
7 Use Double-Pinyin Input
Double-pinyin input maps the initial and final sounds of each Chinese character’s pinyin to one key each. Once you know the layout, most pinyin syllables require only two keystrokes. Compared with full pinyin, this significantly reduces the number of keystrokes and can also increase Chinese typing speed.
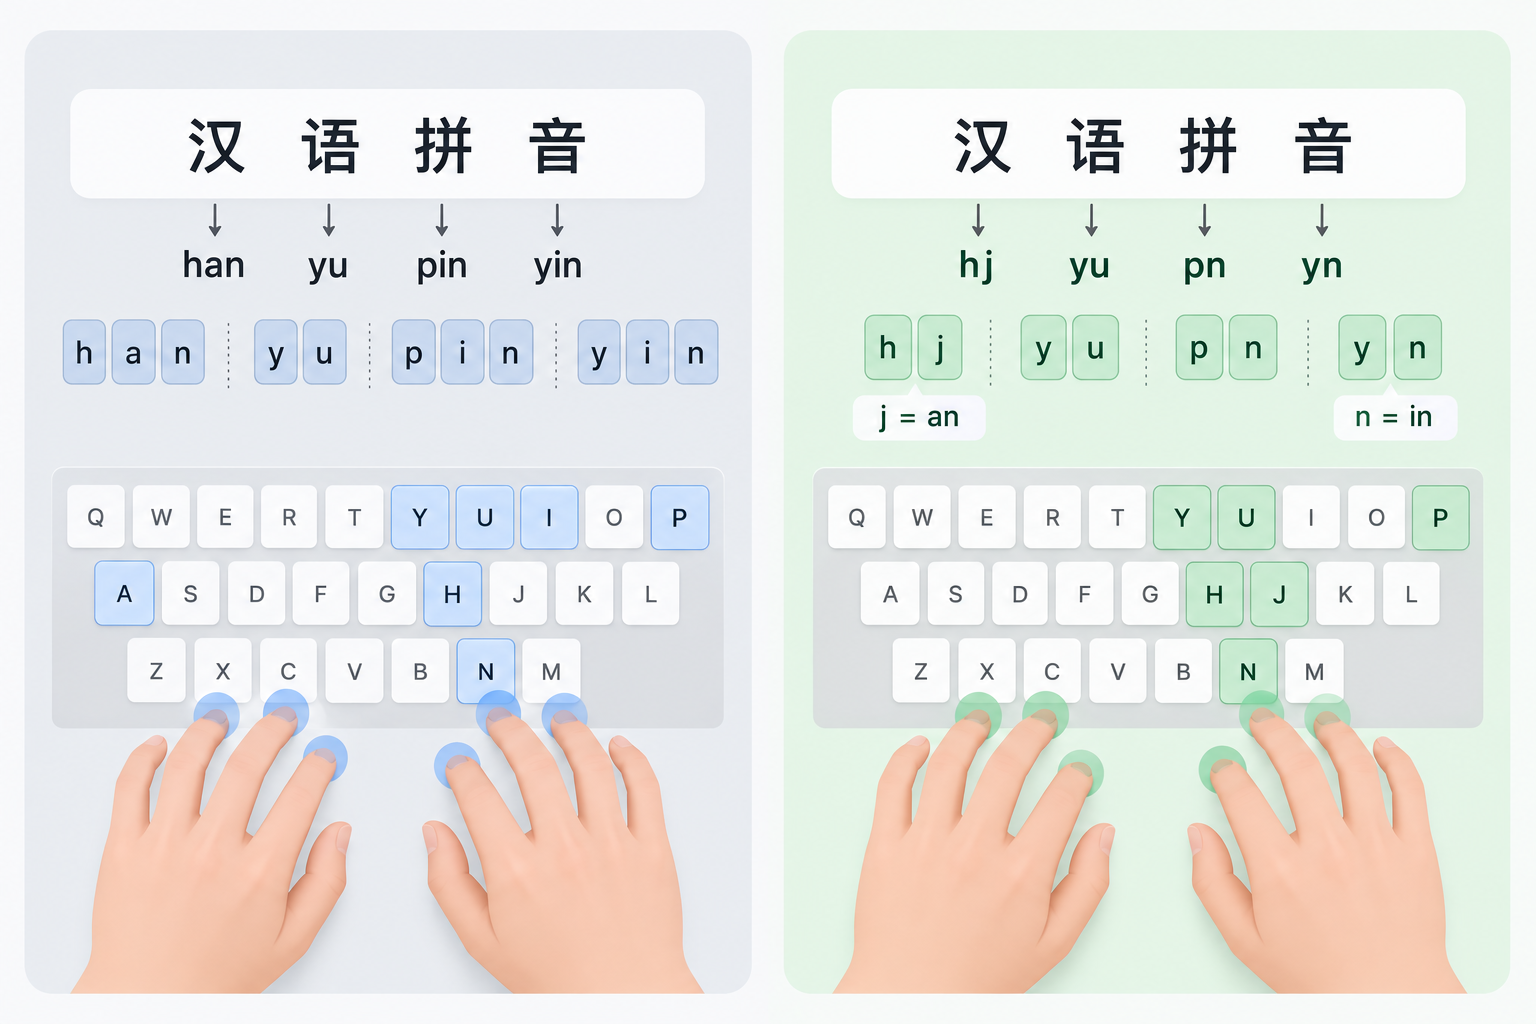
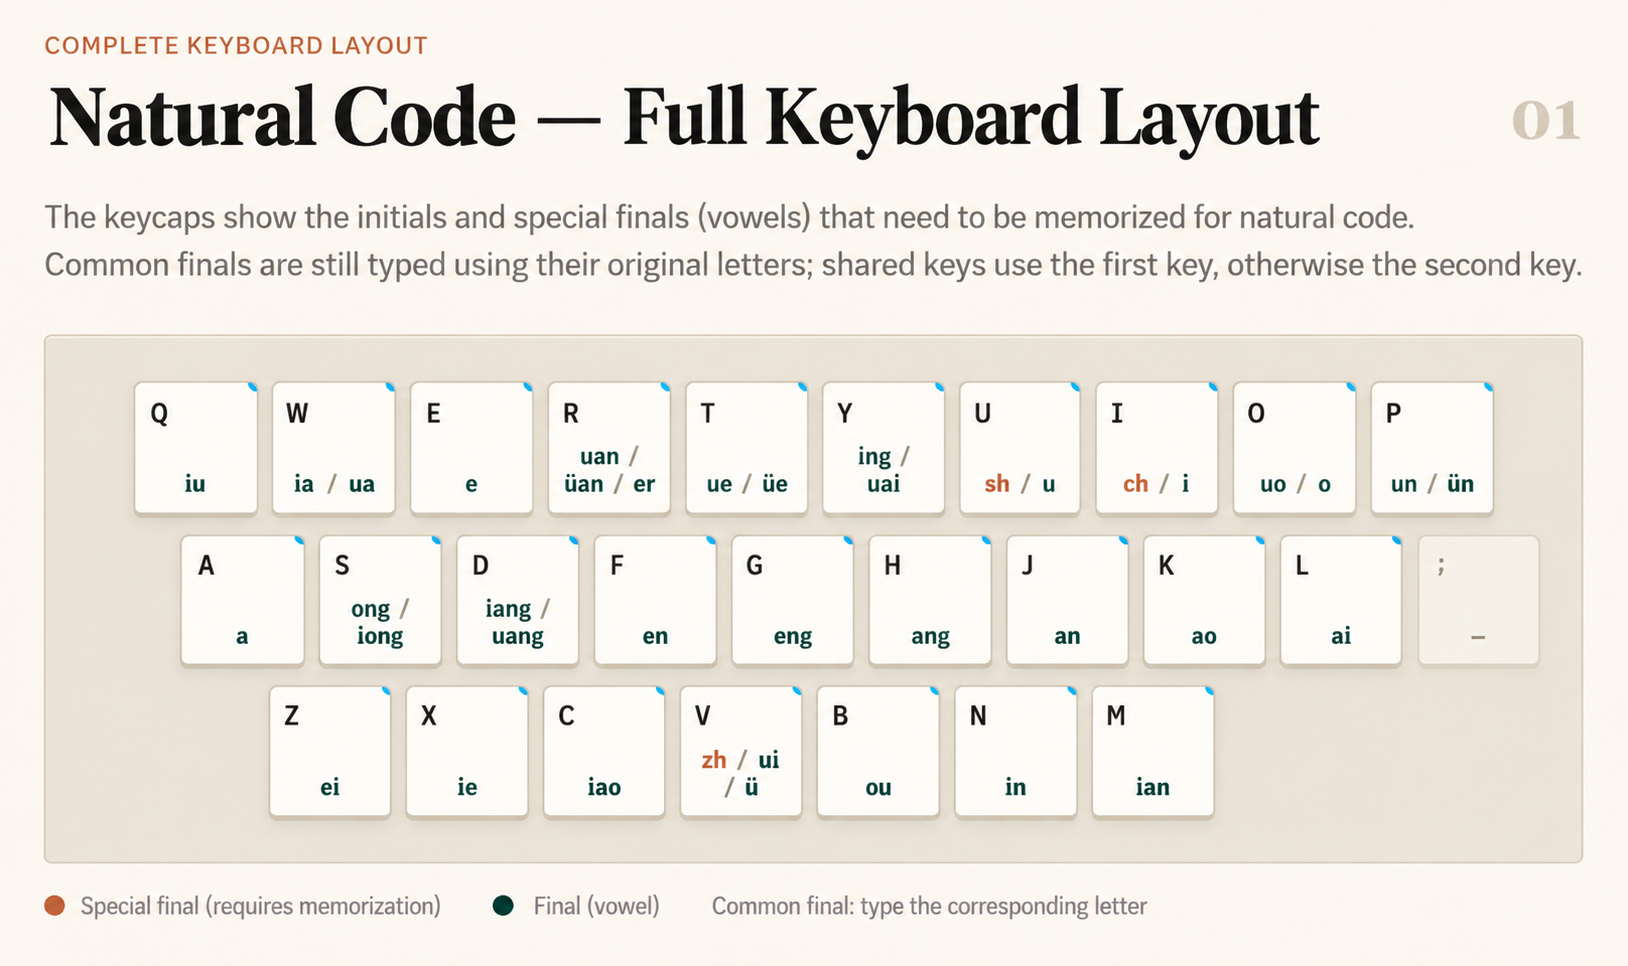
Below is the keyboard layout for the Ziranma (Natural Code) double-pinyin scheme. Several other double-pinyin schemes are also available.
8 Use Software Shortcuts
In addition to adjusting hardware and key mappings, I use Raycast, in-app shortcuts, custom macOS keyboard shortcuts, and Automator or Shortcuts to automate repetitive tasks. These tools also reduce clicking and typing, but they are more about software workflows, so I may cover them in a separate post in the future.